Getting started
Add your first destination
What to pick first, how to set it up, and what happens when the destination connects to your project.
A destination is anywhere Tusk can put a verified copy of your files. External drives, Google Drive, Dropbox, AWS S3, Backblaze B2, Cloudflare R2, MinIO, Wasabi, or any other S3-compatible bucket. Most people add two: one local for speed, one cloud for safety. (SD cards are usually offload sources, not destinations.)
This page walks through adding the first one inside the new-project wizard. You can also add destinations later from the project's settings page; the form is the same.
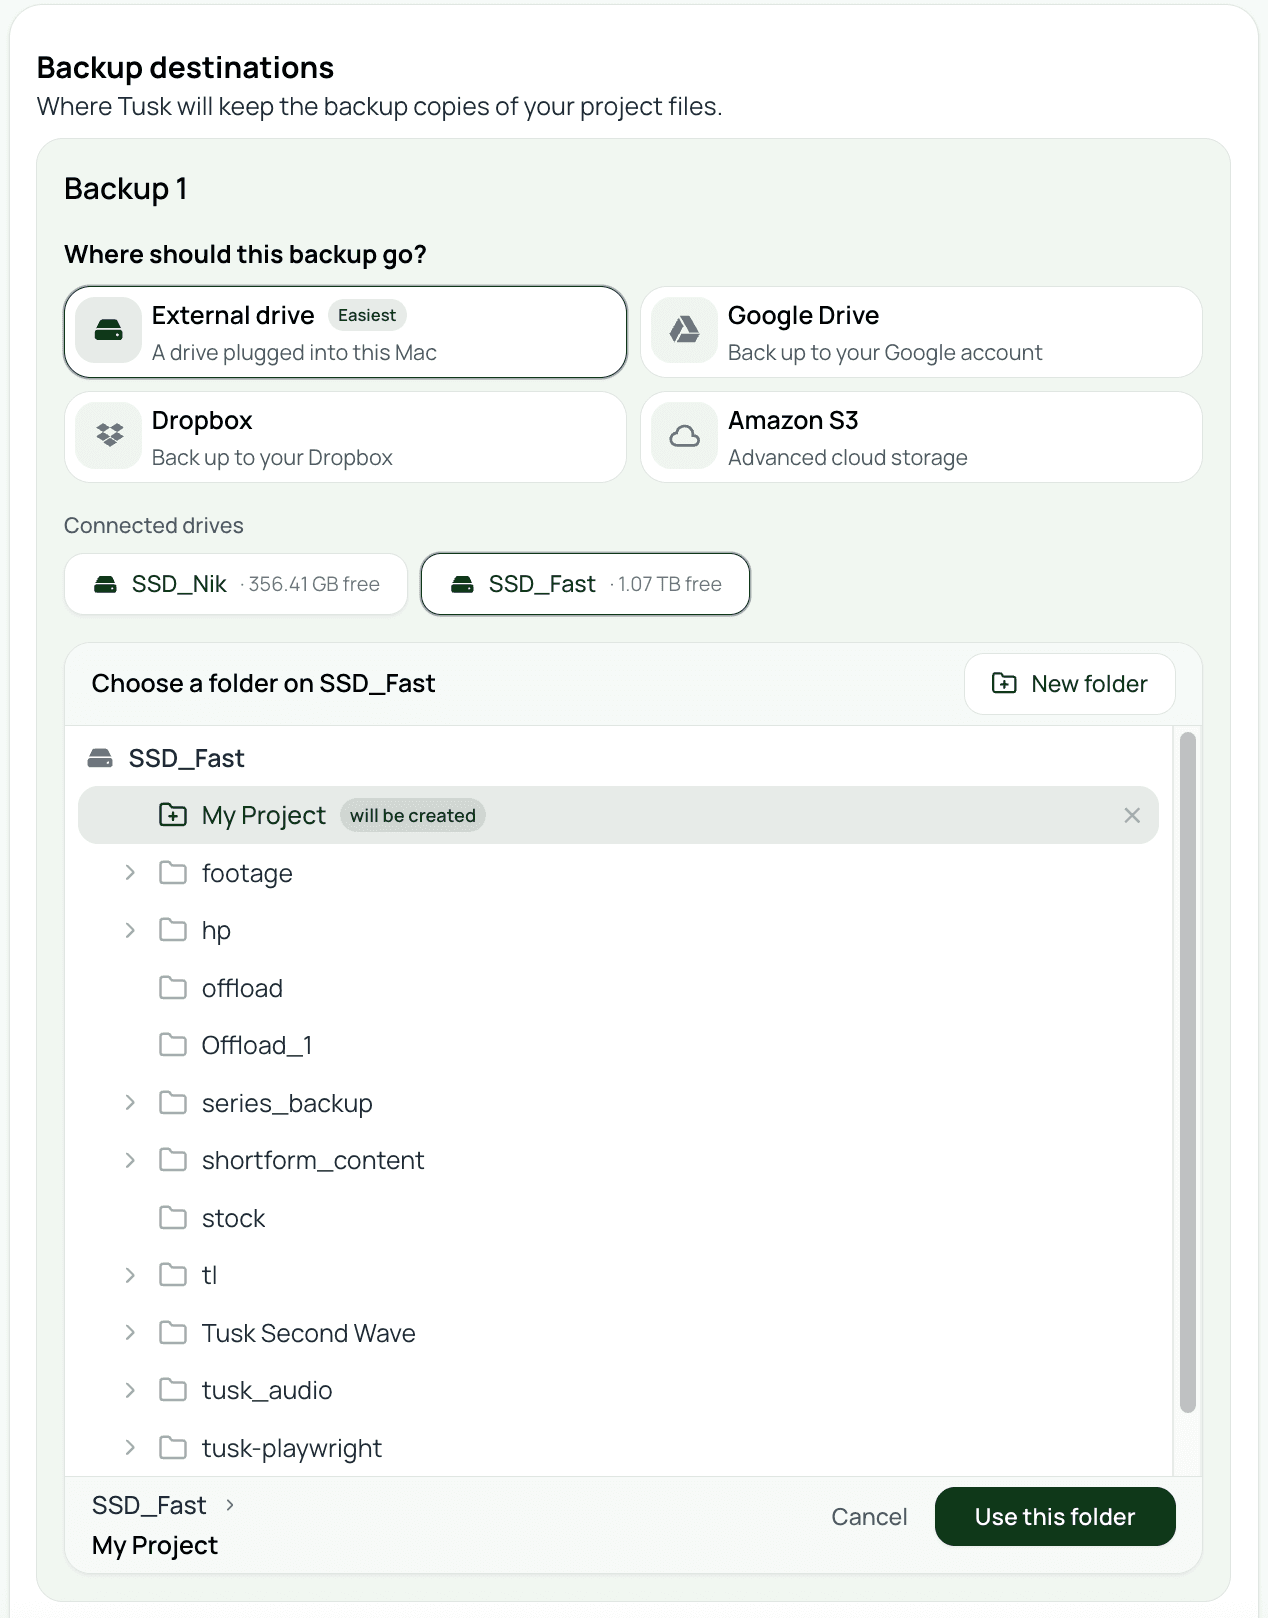
Pick what to start with
For most projects, an external drive (SSD or HDD) is the fastest first destination to set up. Plug it in, point Tusk at a folder on it, and you're done. Cloud destinations have one extra step (account or credentials) but they protect you against a single physical location going wrong, which is the entire reason the 3-2-1 rule exists.
If you only add one, pick the one you're less likely to lose. For most people that's a cloud destination. For others (limited bandwidth, large files), it's a drive stored at a different physical address. The deeper guidance is on the Choosing your destinations page.
You can mix and match later
Add an external drive
Make sure the drive is plugged in, mounted, and showing up in Finder before you start.
1
Choose External hard drive in the destination picker
2
Pick a folder on the drive
/Volumes/SSD_Fast/Tusk/Wedding_Smith_2026-04-15) rather than the volume root.3
Confirm the destination label
4
Save
Add Google Drive
You connect a Google account once, then reuse it across as many projects as you want. The full per-provider page is Google Drive; the short version below is enough to get going.
1
Choose Google Drive in the destination picker
2
Sign in to Google in your browser
3
Grant Tusk the drive.file permission
4
Pick a folder name and save
Add Dropbox
Dropbox connects with OAuth like Google Drive, with one important limit: Tusk only writes under the Dropbox app folder Apps/Tusk. The full page is Dropbox; the short version:
1
Choose Dropbox in the destination picker
2
Set the folder name
Dropbox / Apps / Tusk / {folder name}.3
Save
Add an S3-compatible bucket
One form covers AWS S3, Backblaze B2, Cloudflare R2, MinIO, Wasabi, and any other S3-compatible service. The differences are the endpoint URL and the access key format.
Each provider has its own per-page setup with the exact endpoint and key format: AWS S3, Backblaze B2, Cloudflare R2, MinIO, Wasabi & others. The short version:
1
Choose S3-compatible in the destination picker
2
Enter your endpoint, bucket, and folder
s3.us-east-1.amazonaws.com), bucket name, and the path inside the bucket where Tusk should write your project's files. The folder must be empty; Tusk blocks adding a destination that already contains files from another tool to prevent mixed sessions.3
Test the connection
4
Save
Credentials live in your Keychain
What happens once a destination is added
Tusk starts a sync pass for the project. Every file in the primary folder gets queued for transfer to the new destination, and the file table updates per row as the transfers complete and Tusk verifies each copy with a BLAKE3 checksum. You can watch the progress on the project page or close the window and let it run in the background.
From now on, anything that changes in the primary folder propagates to this destination automatically along with all your others.
Related